If you’re a new developer, you’ve probably run across a command-line command or two and it’s not uncommon to be a little intimidated by or just plain not like the terminal. With so many GUI tools out there like GitHub Desktop, why would anyone use an old command-line terminal that looks like it’s from the 80s? Well, besides the fact that the command line can be a lot more versatile and efficient, it also doesn’t have to look like the archaic dreary black-and-white system-font terminal we often see by default.
Picking a Terminal application
If you’re reading this post, I assume you are doing so in a web browser on an operating system with a GUI and a desktop. That means, you aren’t living entirely within a shell, instead, we are accessing our shell via some terminal application. While the shell is the key component in our experience, the application you use to interact with your shell can provide different features such as tabs, fonts, etc, and should not be overlooked.
VS Code
This is the terminal application you are likely already using. It’s the built-in terminal in VS Code. I actually have this terminal open right now just below the words I am typing as I write this blog post.
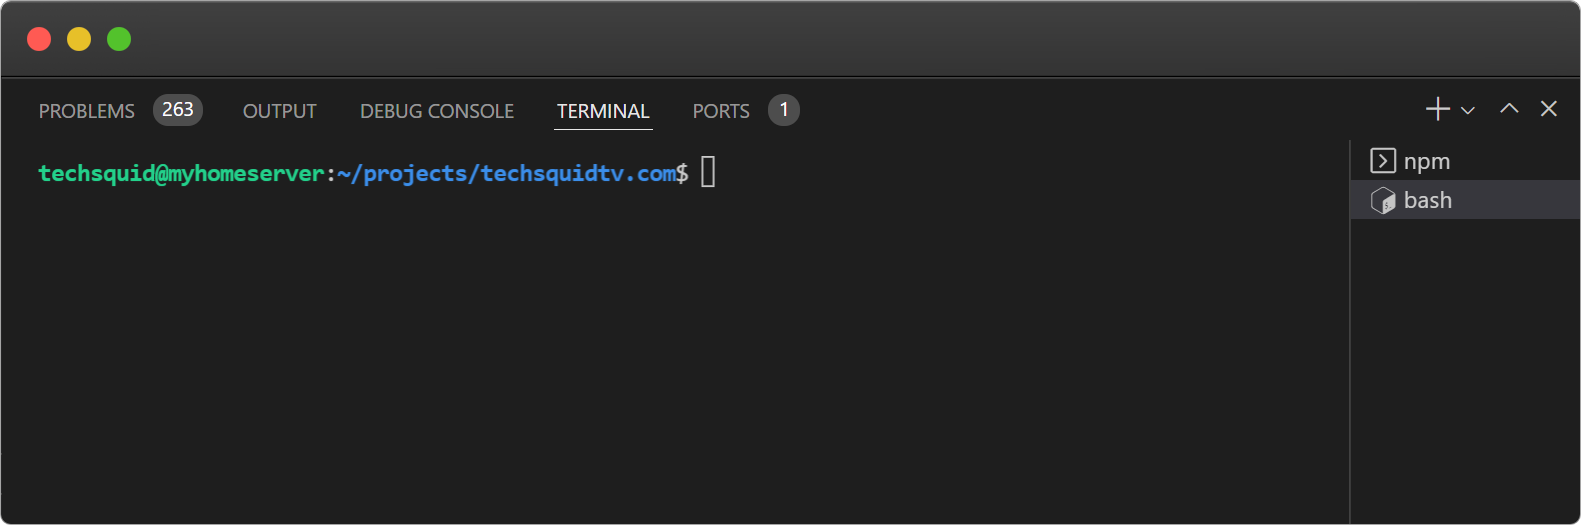
It’s quick, it’s convenient, it’s integrated. In fact, it has almost all of the features you want in a terminal application. But, it’s probably not what you want to open when you are strictly looking to open the shell, without necessarily opening an entire IDE. So, it gets an honorable mention here but we won’t spend too much time on it.
Pros
- Integrated in your IDE
- Supports multiple shells
Cons
- Requires you to open VS Code
Windows Terminal
For Windows users only, of course, this is the Windows Terminal, available on the Microsoft store.
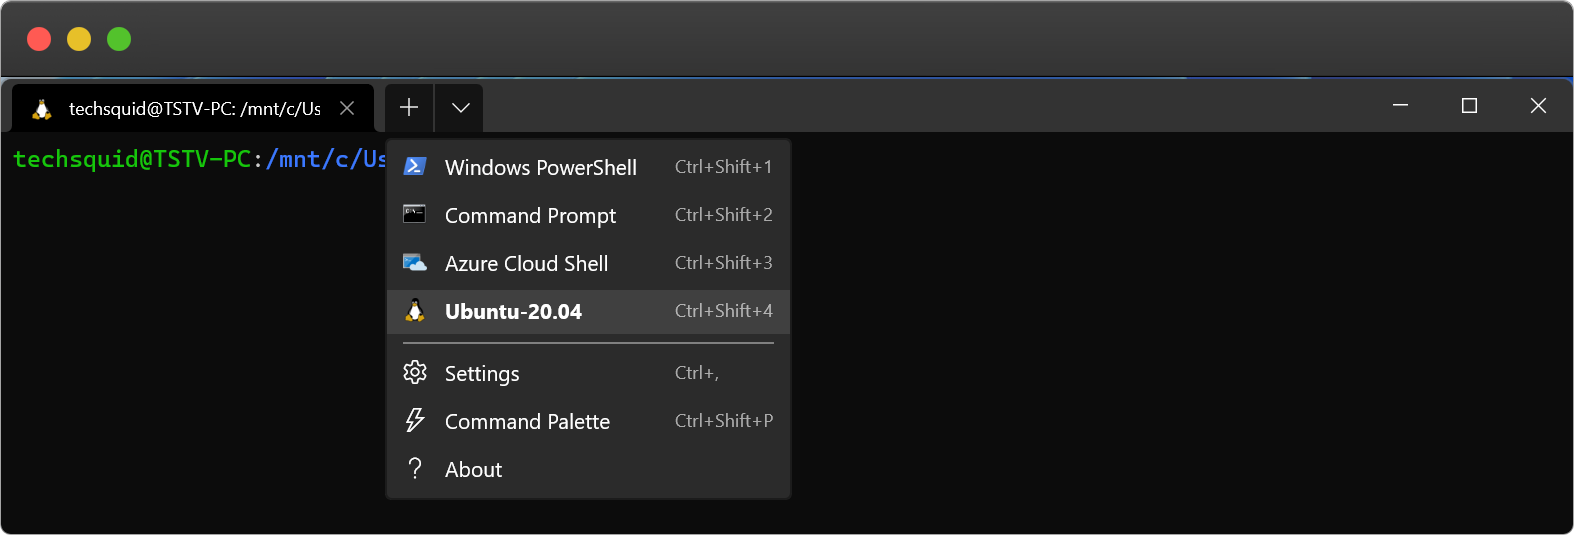
The windows terminal is open-source, available on GitHub and supports tons of customizations options via a simple JSON config.
Most interesting is the ability to run multiple different terminals/shells within different tabs. You could run PowerShell, Bash (WSL Ubuntu), Command Prompt, and Azure Cloud Shell all right next to each other, with the same color schemes. Of course, you could add your own shells as well.
This is a solid choice for Windows users.
iTerm2
iTerm2 is a popular choice for macOS users that aims to replace the native terminal.
iTerm2 keeps a lot of the feel of the native terminal with a few quality of life improvements you’d expect and great system integrations such as status bar integration.
iTerm2 is near-ubiquitous among mac terminal users to the point where it is nearly the defacto default, but in my opinion, still leaves a bit to be desired.
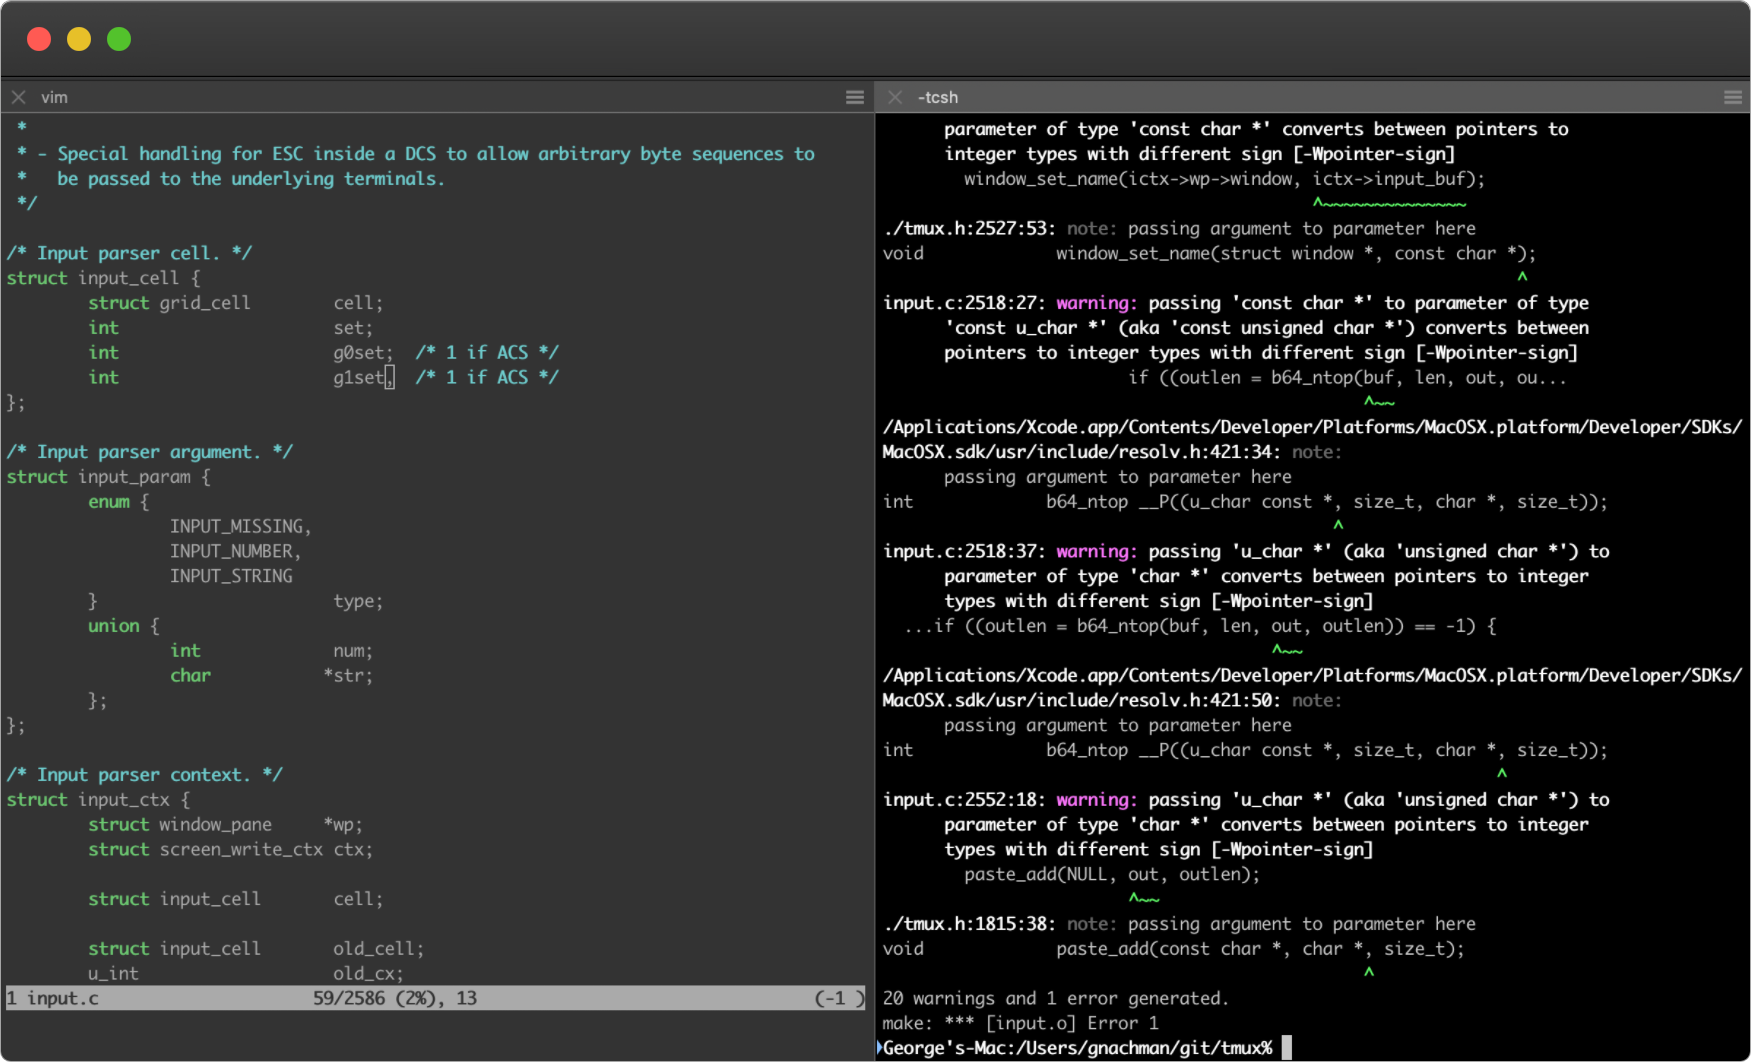
Tabby.sh
Potentially saving best for last, Tabby is an open source cross-platform terminal app built on web technologies. Being built on web technologies is sure to divide opinions on this app, and granted it is a little slow to open up as a result of this, the feature-richness is more than enough to make up for it to me.
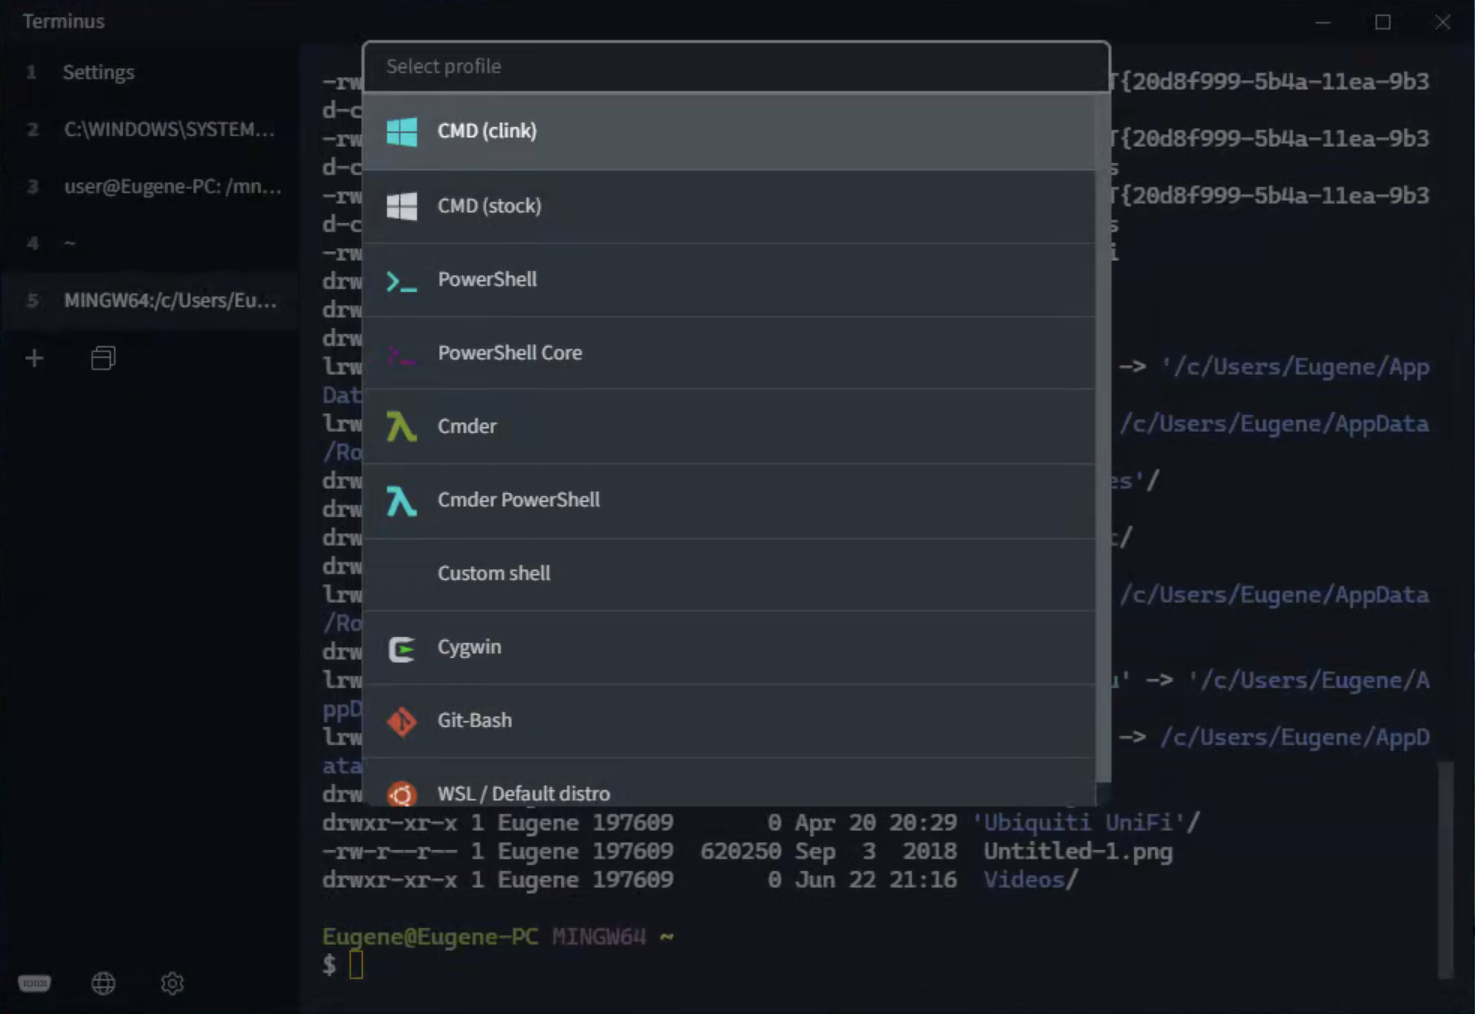
Tabby has an extensive set of features including the ones you have come to expect from the other terminals, such as “split tabs”, and “hotkeys”, and going beyond with unique features like “smart tabs” which can trigger a system notification when a process has completed, or Serial Terminal for hardware tinkerers. On Windows, Tabby will also support multiple shells just like the Windows Terminal.
The cross-platform nature means you can use the same terminal and configuration across your multiple machines for a totally consistent experience if you work from multiple OS’s
Installing a better shell (ZSH)
You are probably at least somewhat familiar with Bash, the GNU “Bourne Again SHell” standard in Ubuntu (Debian) Linux in many others. If you’ve opened a terminal on Linux, you are likely looking at the Bash shell. If you are on macOS, Catalina and onward, your default shell is ZSH.
ZSH is an extendable shell that behaves similar to Bash with a few additional features, and it’s themeable. Our shell will show up in more than just our terminal application, if you use the built-in terminal in VSCode for example, you will get your ZSH shell if configured. So it’s important to have not only a nice terminal application but to actually configure and personalize our shell.
On Debian based Linux distros like Ubuntu, we can install ZSH with apt
apt install zshTo make sure zsh is your default shell, run:
chsh -s $(which zsh)Finally, close your terminal application and re-launch it to open a fresh new shell.
To verify we are now using zsh, let’s check the running process and we should get back the path to the zsh shell.
$ echo $0
/usr/bin/zsh
Installation for a host of other operating systems can be found in the Oh My ZSH wiki.
Customize with Oh-My-ZSH
Oh My ZSH is a “framework” for managing your ZSH configuration. Which is to say, it makes it easy to install plugins and themes for your shell.

Most of the terminal applications we mentioned above have their own independent color scheme and theming abilities, but like we also mentioned, we aren’t always in our terminal application, sometimes we are in VS Code for example and we will not have the same exact features. But luckily we can manage much of the same theming abilities directly in our shell, and there is an excellent ZSH config manager called Oh My ZSH that will help us do it.
Install Oh MY ZSH
sh -c "$(curl -fsSL https://raw.githubusercontent.com/ohmyzsh/ohmyzsh/master/tools/install.sh)"Theme ZSH with PowerLevel10K
Boom you’re done. Now, you can follow the Oh My ZSH Docs on how to configure and manage plugins for ZSH, but! There is a popular ZSH theme with a lot of great plugins pre-configured that’s really easy to install.
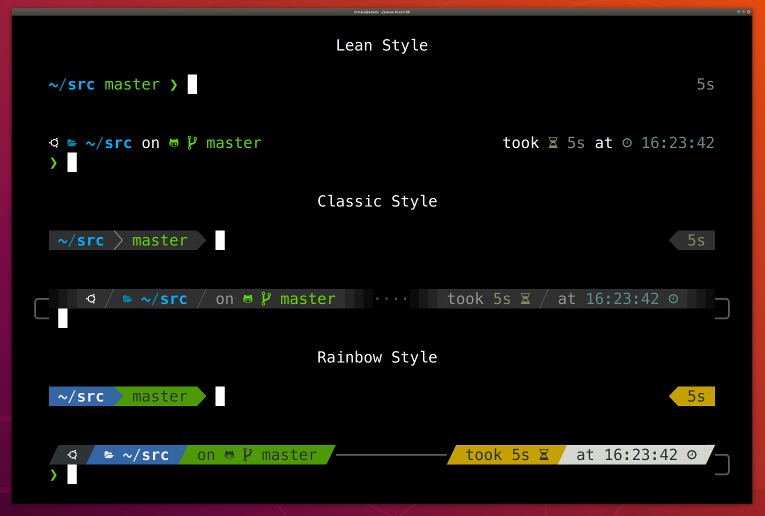
PowerLevel10K will give us a quick path to a beautiful and functional terminal theme. This is really the magic in creating a beautiful terminal experience. The main features we are going to get out of this is glyphs/icons, colors, and git information right in our prompt.
Install PowerLevel10K for ZSH:
git clone --depth=1 https://github.com/romkatv/powerlevel10k.git ${ZSH_CUSTOM:-$HOME/.oh-my-zsh/custom}/themes/powerlevel10kecho 'export ZSH_THEME="powerlevel10k/powerlevel10k"' >> ~/.zshrcexec zshA configuration wizard will be started automatically and you can make multiple selections to customize your experience. Everything shown in the configuration wizard is completely up to your personal preference.
Install and configure beautiful CLI apps
To take full advantage of our modern systems, we need modern applications. Most of the base system tools you use today are largely unchanged since they were originally released in the early 80’s. They work, they get updated so they keep working, but we can do so much better.
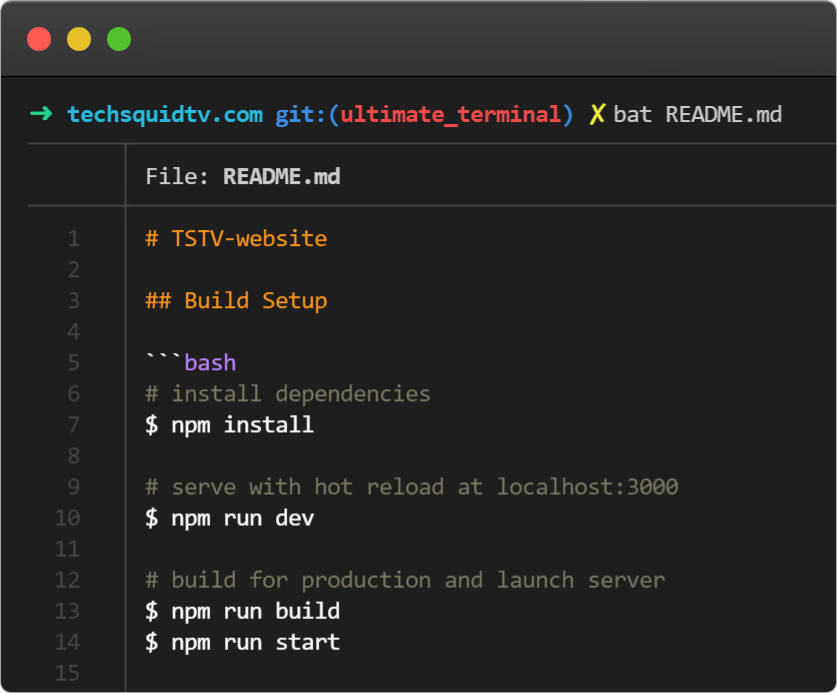
bat - A cat clone with syntax highlighting and Git integration.
bat is a modern alternative to cat written in rust with several additional features, such as syntax highlighting and git integration.
Install bat
sudo apt update && sudo apt install batYou can then use bat in any situation where you might normally cat a file, and syntax highlighting will be included.
Rather than needing to remember to run bat all the time, you may want to add an alias to your shell’s profile. If you’re following this guide, your ~/.zshrc file is what we want to modify, we can just append our alias like so:
Set bat Alias
echo "alias cat=bat" >> ~/.zshrcNow, if you reload your shell you can run cat --version and you’ll see that bat returns instead.
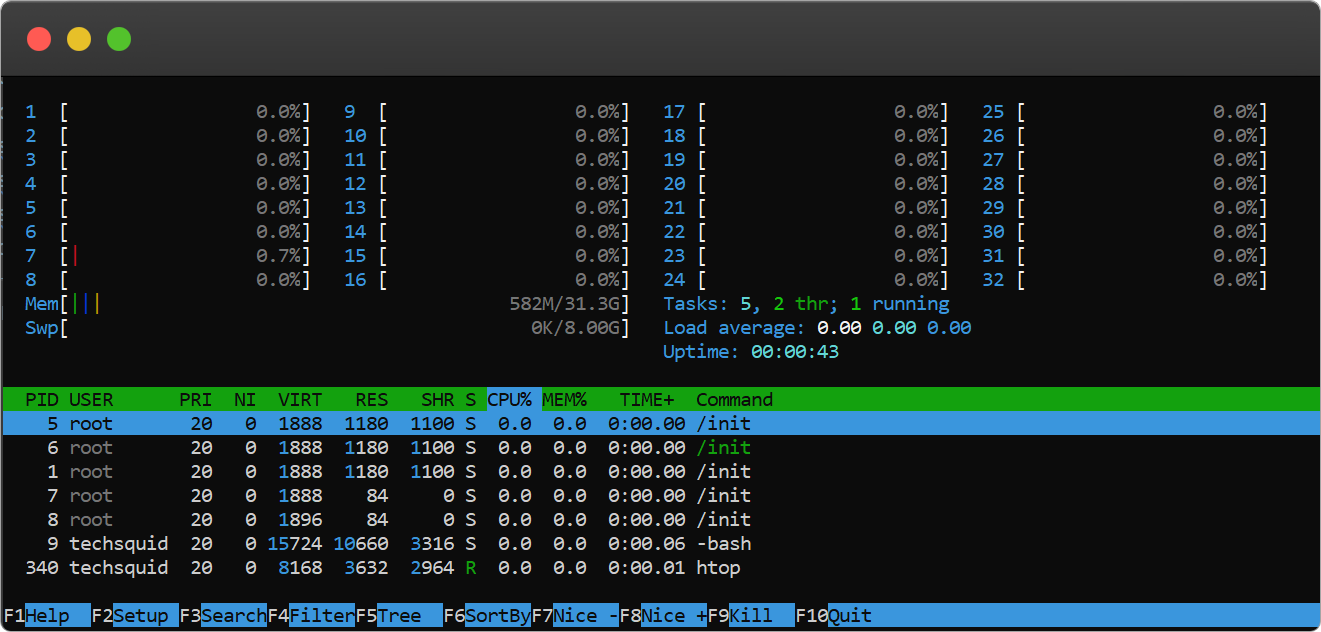
htop - A modern advanced replacement for top
htop is a beautiful modern cross-platform process explorer for the shell written in Go. htop offers a number of customization features from functional filters to personalized themes.
Install htop
sudo apt update && sudo apt install htopSet htop Alias
If you choose to, especially if you are used to typing top, you can set an alias so that htop is ran instead.
echo "alias top=htop" >> ~/.zshrcRun top --version to confirm after setting your alias.
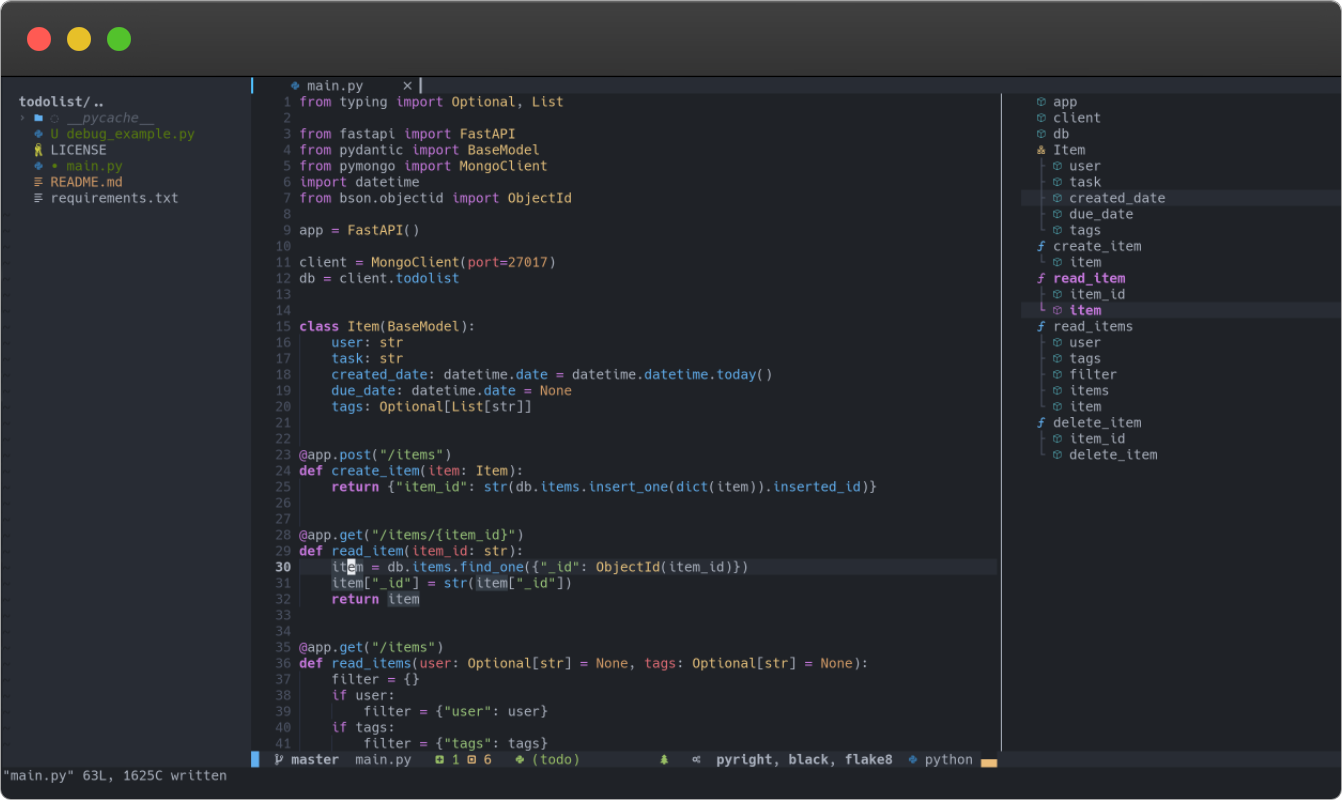
neovim - A modern advanced replacement for vim
Neovim is a drop-in replacement for vim, the Linux master’s favorite terminal text editor. Out of the box, you won’t notice too much difference, except for some sensible defaults such as “Syntax highlighting”. Neovim is also extensible via a LUA API and has a large library of available plugins.
Install neovim
You can follow the official Neovim docs for installation instructions for a wide range of operating systems.
Although we can install neovim with apt the Debian packages in each release are typically outdated, as whichever version shipped with that version of Debian is what will be available. To install Neovim’s latest version, we will install the AppImage released on their GitHub. The instructions here are a little different from what is shown in the GitHub ReadMe, but you’ll want to follow these steps to ensure we properly install Neovim.
# create directory if it does not already existmkdir ~/Applications# download nvim AppImagecurl -LO https://github.com/neovim/neovim/releases/latest/download/nvim.appimage# make the binary executablechmod u+x nvim.appimage# move it to our new Applications dir for our usermv nvim.appimage ~/Applications/nvim.appimage# Add the Applications path to our ZSH environmentpath+=("~/Applications/")You should now be able to run nvim.appimage --version and see that nvim is installed. However, right now we need to type out nvim.appimage to run neovim, so let’s setup some aliases.
Set neovim Aliases
While we could call nvim.appimage directly, it isn’t very convenient, and we’d rather be able to call nvim. A helpful user on github points out, rather than a typical “alias”, we actually want to create a symbolic link from nvim.appimage to a new nvim binary in our path. This will ensure that nvim works regardless of what shell we use or what config we have setup.
mkdir -p ~/.local/bin/ # if it does not already exist.ln -s ~/Applications/nvim.appimage ~/.local/bin/nvimpath+=("~/.local/bin")Save your changes and reload the shell or source the ~/.zshrc file to load the changes. You should now be able to run which nvim and see the symlinked bin at home/<user>/.local/bin/nvim.
Now, let’s go a step further and add some actual aliases for our personal use. In our case, we will want nvim to launch, in the event we accidentally forget and type either vim or vi instead.
echo "alias vi=nvim" >> ~/.zshrcecho "alias vim=nvim" >> ~/.zshrcOnce you reload the terminal or source your config (source ~/.zshrc), you can type vi or vim and see NeoVim will launch instead.
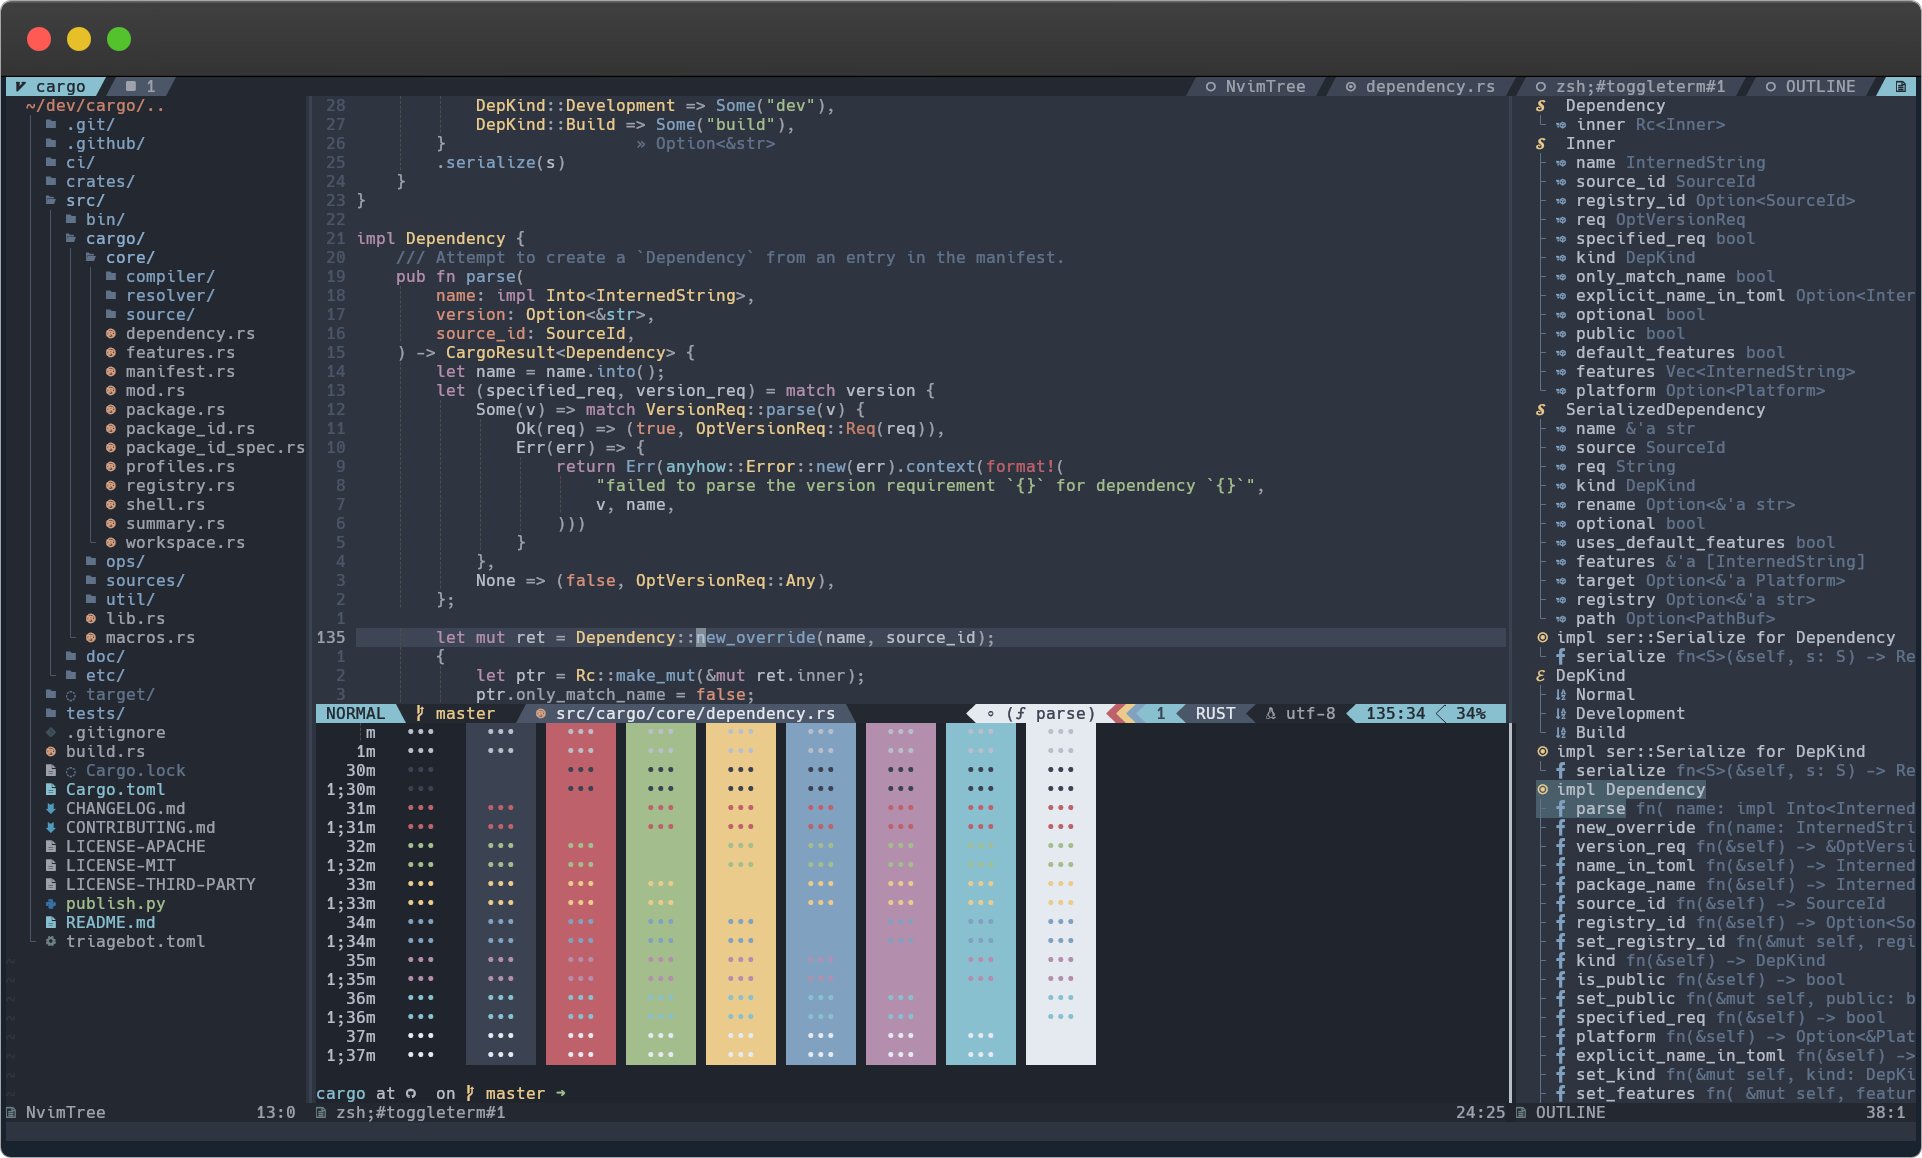
Customize Neovim With LunarVim
As mentioned above, because of Neovim’s extensive API, there is a thriving community with endless themes and plugins. If you want full control and customization, you can install a plugin manager for vim/neovim and manage configuration files. Configuring your own setup requires a blog post of its own to go through and can be quite involved. To get up and running with a good theme and a sensible set of default plugins and settings, luckily there is a plug-and-play package we can install: LunarVim.
LunarVim is self-described as:
“An IDE layer for Neovim with sane defaults. Completely free and community driven”.
LunarVim looks beautiful and brings immense power to the terminal, but best of all, installing and configuring it is only a single line after we have installed neovim and any pre-requisites.
LunarVim requires Node, pip (Python), and cargo (Rust).
If you need to install Node, nvm is one of the best ways to install and manage node versions. For pipand cargo, we can install from apt or brew.
sudo apt install pipsudo apt install cargoOnce we are ready, installing LunerVim is one line:
bash <(curl -s https://raw.githubusercontent.com/lunarvim/lunarvim/master/utils/installer/install.sh)Select “yes” to all of the prompts, and at the end we should have another executable right next to nvim now called lvim. You can run which lvim to make sure it has been installed properly, you should get back the path to the binary.
Set lvim Aliases
Just like we did with nvim, we actually now want to point to lvim and not nvim at this point. If you followed the tutorial so far, we’ll want to open up our ~/.zshrc file and edit the aliases we just created. Why not use lvim now to make those edits?
Open ~/.zsh with lvim
lvim ~/.zshrcNow scroll down to the bottom and look for the lines we added earlier (or add them now if you skipped the previous steps) and modify the values to point to lvim rather than nvim.
alias vi=lvimalias vim=lvimReload your shell and you are set to use vim and vi (from zsh) and you will be greeted by a full terminal-based IDE.
Conclusion
The terminal can be a scary place for new folks or just a plain boring experience for folks who have been using terminals the way they were designed in the 80’s. If you haven’t been paying attention it would be easy to miss (or dismiss) some of the advancements that have taken place.
If this post interested you, we’ll be talking a lot more about terminals! Be sure to join “The Full Stack” newsletter below and we’ll update you (not very often) with new posts from TechSquidTV as well as other great educational content for developers.
If you have any of your own tips for making the terminal beautiful, comment below on GitHub!